Thursday, April 21, 2011

Chocolate Ganache Cupcakes

I am pretty much a reality television junkie. Combine that with my love for cooking and baking and the show "DC Cupcakes" is right up my alley. I have watched this show for quite a long time and admire how amazing their cupcakes always look. Their frosting looks flawless and their variety of cupcakes flavors is nothing short of spectacular. I will admit that I've looked at their website and have actually considered ordering some of their cupcakes and paying an insane amount of money to have them shipped to me. *blush* When I realized that quite a few of their cupcake recipes were actually on the internet, I had to make them!!

I wasn't too sure about this recipe at first because right until the very end it seemed pretty watery, but the cocoa powder at the very end fluffed them right up. These were out of this world, make you want to eat 3 for dinner (I didn't actually do this) and then stick out your tongue at Katherine and Sophie at Georgetown Cupcake that you can make them on your own now GOOD! The texture of this cupcake was fantastic!!!!!!!!!!!!!! The ganache frosting took it to an entirely different level. Not only is it just about the easiest thing EVER to make, but it looks great and tastes incredible. You must make these cupcakes. Go, right now...stop what you are doing and make them!


Chocolate Ganache Cupcakes
(courtesy of Georgetown Cupcakes)

  • 1 1/4 cups all purpose flour, sifted
  • 1/2 teaspoon baking soda, sifted
  • 1/4 teaspoon salt
  • 8 tablespoons (1 stick) unsalted butter, at room temperature
  • 1 1/4 cups sugar
  • 2 large eggs, at room temperature
  • 1 1/4 teaspoons vanilla extract
  • 1 cup whole milk, at room temperature
  • 1/2 cup cocoa powder, sifted
You will start by taking out the cold ingredients and bringing them to room temperature. This may not seem important, but it actually is. I would aim for taking them out about 30 minutes before you start your recipe.

Preheat the oven to 350 degrees

Lay a piece of wax paper (or parchment paper) on the counter and sift the flour and baking soda on the paper.


In a stand mixer (or using a hand mixer) beat the butter until soft and fluffy. Once your butter looks smooth and fluffy, stop the mixer and add your sugar. Continue to mix until it is thoroughly incorporated.


Crack your eggs into a small bowl and add them one at a time into the butter/sugar mixture while mixing on low speed. After both eggs have been added, scrape down the sides of the bowl with a spatula.


Your milk should already be measured and sitting somewhere at room temperature. Add the vanilla to your milk.


Now you are going to alternate adding the flour mixture and milk at low speed (add 1/3 of the flour and then 1/3 of the milk and continue until it is gone) Once you have added everything you only want to mix until it is just combined, don't over mix it.


Now sift your cocoa powder and add that while mixing on low speed just until it is incorporated.


(scrape the bowl after adding the cocoa powder)

This recipe should make a total of 18 cupcakes if you measure them out with a standard size ice cream scoop. I like mine slightly bigger than most people, so my recipe only made 12 cupcakes.


(I suppose I should work on scooping the batter neatly into the cupcake papers. bahhhhh!)

Bake for 18-20 minutes, or until a toothpick inserted comes out clean. Cool on a wire rack completely before making your ganache.


Ganache:


Heat 2 inches of water in the bottom of a double boiler. In your pan or heat proof bowl over the water, combine 1 cup semi-sweet chocolate chips (use your favorite!) with 1/2 cup heavy cream. Stir until the chocolate is melted and the mixture is smooth and shiny. Remove from heat and allow it to cool for 2-3 minutes.


Swirl each cupcake in the ganache, twisting it to be sure it is completely covered and then quickly tip right side up and place on a piece of wax paper.


You can leave them as is or decorate them more! Isabella and I decided to spruce ours up with some fondant and sprinkles :)


These were spectacular!

Turkey Chili

I broke all the rules with this chili. I originally was thinking about making some soup today. When I opened the pantry I saw a soup starter kit in there and was just going to throw that together real quick. I changed my mind pretty quickly when I saw a can of kidney beans next to it and I started leaning more toward wanting chili. For some unknown reason I had the strange idea to use the soup starter kit in my chili and it went from there. The soup starter kit was for a Tuscan Style White Bean & Fire Roasted Garlic Soup. There was no way that those flavors wouldn't be amazing in chili! You can find this soup starter at Target, I'm pretty sure that it is exclusively sold there.


Turkey Chili

  • 1 pound lean ground turkey (I used 93% lean)
  • 2 28oz cans diced tomatoes
  • 1 can dark kidney beans (do not drain..use the liquid from the can)
  • 1 box Giada De Laurentiis Tuscan Style White Bean & Fire Roasted Garlic Soup Starter
  • 1 small onion, diced
  • 1 medium green bell pepper, diced
  • 1 tablespoon chili powder
  • 1/4 teaspoon cumin
  • 1/2 teaspoon kosher salt
  • 1/4 teaspoon pepper
  • 1/4 teaspoon crushed red pepper flakes (optional)
  • 2 teaspoons minced garlic
  • 1 tablespoon extra virgin olive oil
In a large stockpot, heat the olive oil over medium high heat. Add the ground turkey and cook until the meat is no longer pink, stirring occasionally. Add the peppers and onion to the pan and cook for 2-3 minute. Stir in the spice packet from the soup starter kit, chili powder, cumin, salt, pepper and crushed red pepper.


Add the garlic, diced tomatoes, kidney beans, and the white beans from the soup starter kit and stir to combine.


Cook over medium low heat for a minimum of 30 minutes (I like to cook it longer over a very low heat).


I served mine up with fresh mini loaves of boule bread. You can find my original blog post on how to make these HERE. The only thing you will do differently is to pull off small grapefruit sized balls of dough and shape them into smaller loaves of bread like this. All other directions are exactly the same.


This was a very nice dinner on a damp and dreary day today!
Enjoy!

Monday, April 18, 2011

Roasted Garlic Potato Bread

I never ever get sick of making bread. The smell of fresh bread baking in the oven cannot be beat. I'm one of those people who would rush to the store to buy the fresh loaves of bread early in the morning while they were still warm. I am so happy that I learned to make my own bread. I used to be VERY intimidated by using yeast and even more afraid of the word "kneading". I had no clue what to do and I didn't think I would have an easy time learning. You've seen me post many times about the recipes I've found in the book "Artisan Bread in 5 Minutes A Day".

I've made quite a few of their recipes already:

Homemade Soft Pretzels
Spinach and Feta Bread
Boule Bread
Sun Dried Tomato and Parmesan Bread

I have so many of the recipes tagged in the book that I want to make! After this book I think I'm going to buy their healthy bread book and bake my way through that one. The great thing about these recipes is that each batch makes enough dough to make 4 loaves of bread. You can keep the extra dough in the fridge so you can have fresh bread every day! Next on my hit list is one of their sweet treats. I've got their cinnamon buns in my cross hairs. Anyhow - back to the Roasted Garlic Bread.


Roasted Garlic Potato Bread

  • 1 head of garlic (I did cheat here and use pre-roasted minced garlic)
  • 3 cups lukewarm water
  • 1 1/2 tablespoons granulated yeast (2 packets)
  • 1 1/2 tablespoons kosher salt
  • 1 1/2 tablespoons sugar
  • 1 cup mashed potato
  • 6 1/2 cups unbleached all purpose flour
  • cornmeal to dust the board
If you are using a whole head of garlic and roasting it yourself you want to wrap it in aluminum foil and bake it for 30 minutes at 400 degrees. Cool and then cut the top off the garlic head. The garlic should very easily slide out of the skin. You will need 2 tablespoons of the roasted garlic for this recipe. I used minced roasted garlic that I bought at the store. The bread came out fantastic, but if you have the time you should roast your own garlic. There is nothing better than fresh roasted garlic. It is sweet and incredible.


Peel, cut and boil your potatoes. You need 1 cup mashed, so depending on the size of your potatoes it might be 2-3 potatoes. Once they are fork tender, drain and mash. Set aside until they cool off slightly. It's okay to use them if they are warm, but I wouldn't use them when they are piping hot.


In a large bowl combine the yeast, salt, sugar, water and mashed potatoes and roasted garlic. Stir to combine.


Add the flour in and then stir to incorporate. Continue to stir until it seems that it is too dry and then use your hands to work in any remaining flour. You do not have to knead the dough, just work in the flour.


Cover with a kitchen towel and let it rest at room temperature until the dough rises and collapses, approximately 2 hours. Look at how much the dough rose!!


You can either use it at this point, or you can refrigerate the dough and use it any time in the next 7 days. The dough is much easier to work with when it is cold, so you can make the dough the evening before and then have it ready for you the next day.

When you are ready to bake the bread, sprinkle a little flour on the dough and cut off a piece of the dough about the size of a grapefruit (1 pound).


Smooth the dough out by folding it under itself and rotating it as your turn it in your hands. You basically want an even looking smooth round ball of dough. Let the dough rest on a cornmeal covered surface (a pizza peel if you have one) for 1 hour before baking. This is where I usually set a timer for 40 minutes. At the 40 minute mark you want to preheat the oven to 450 degrees, place a baking stone in the oven and a broiler tray on the rack below it. You also want to dust the top of the bread with a little flour and slash a slit in the shape of a cross or scallop with a serrated knife.


When the oven is preheated, slide the bread onto the hot baking stone. Pour 1 cup of hot water into the broiler tray and immediately close the oven. This traps the warm steam in the oven and keeps it moist while baking. Bake for 30-35 minutes or until deep golden brown and firm. Allow the bread of cool on a wire rack before slicing.


This bread was out of this world. The smell alone was intoxicating! The potato made the bread unbelievably moist. Another winner!


Sunday, April 17, 2011

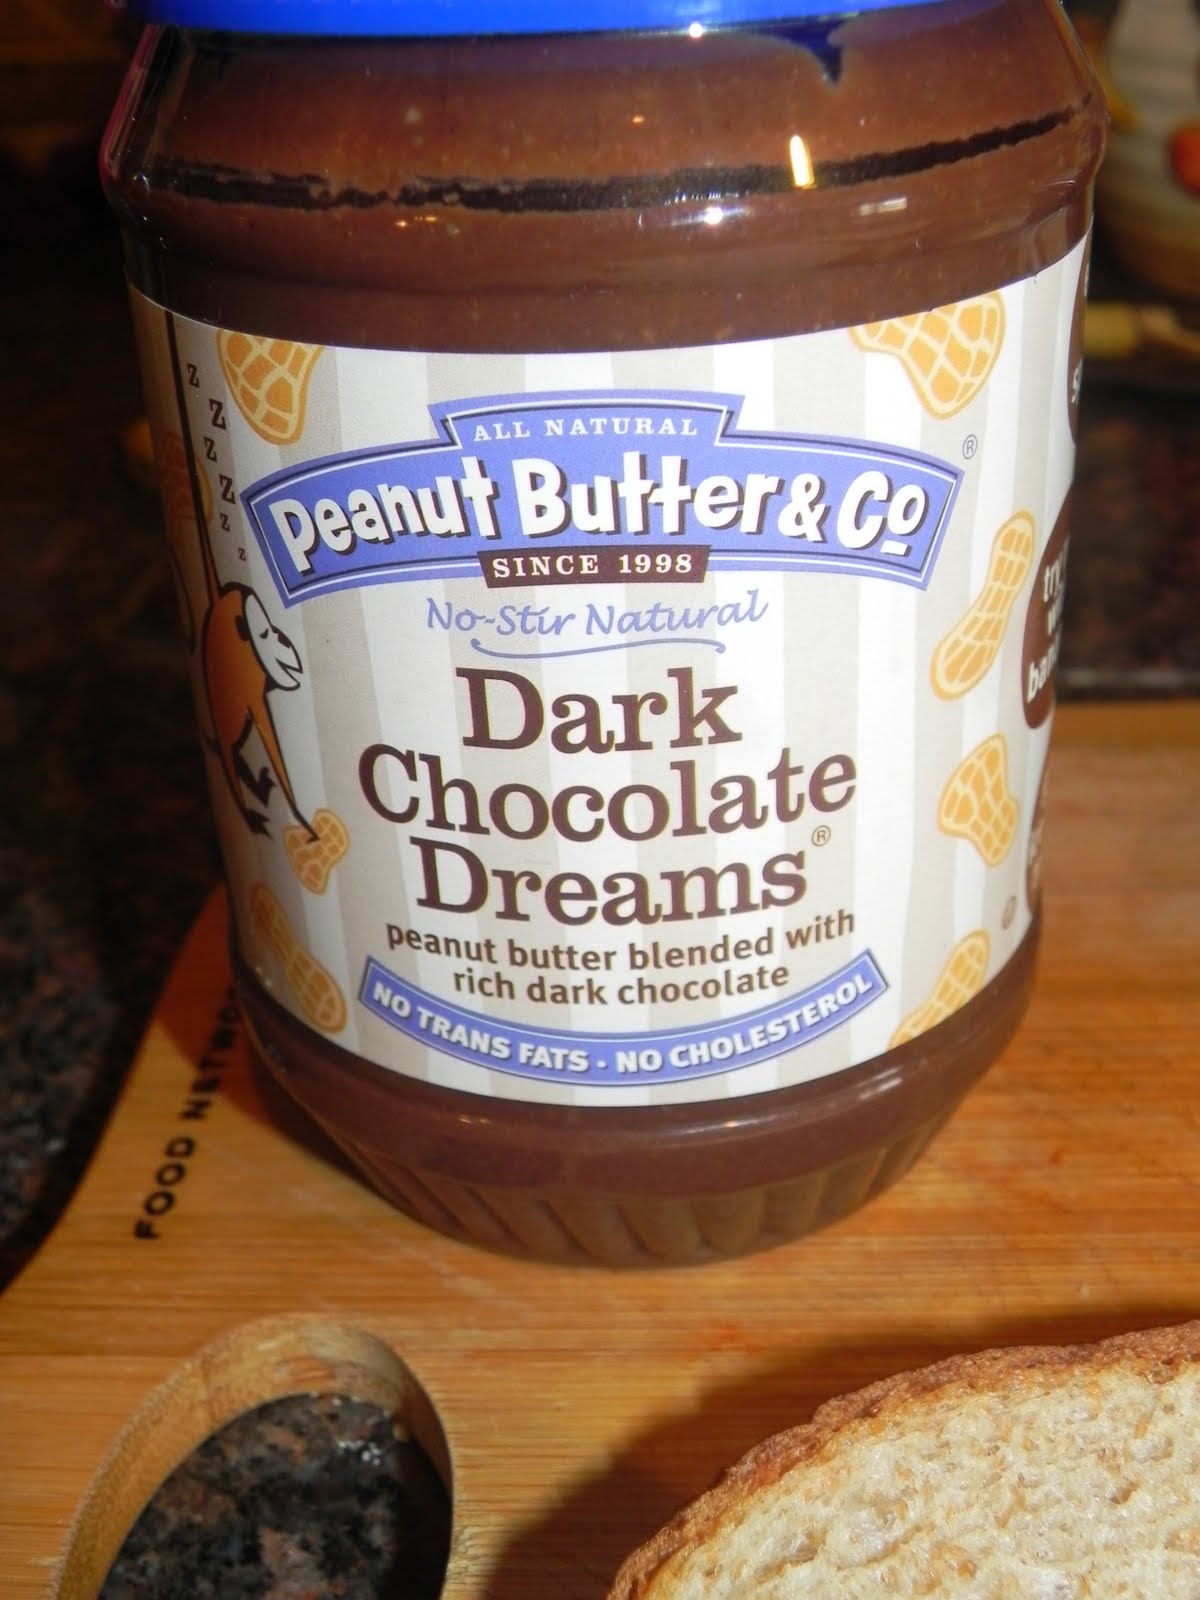
Chocolate, Peanut Butter, Banana Stuffed French Toast

Today was a great morning in my house! Giselle was sick yesterday and I was worried I would be up all night tending to her. She woke up this morning fever free and in good spirits. This is also a great Sunday because Isabella is off of school all of next week for spring break :) What better way to surprise her than chocolate in her breakfast!!! This was super fast, easy and a great treat. I hope you are all enjoying your weekend as much as we are.


Chocolate, Peanut Butter, Banana Stuffed French Toast


  • 4 slices banana
  • 1 teaspoon chocolate chips
  • 1 egg, beaten
  • cinnamon sugar
  • powdered sugar

Start by spreading the chocolate peanut butter in the center of the bread. Try to keep it close to the middle so when we remove the crust you don't lose your filling (you can also make this without taking the crust off).


Put the banana slices on top of the chocolate peanut butter and then top with the chocolate chips.

Put the other slice of bread on top and use a 3 inch biscuit cutter to remove the crust. You can use any cookie cutter you like or leave it whole if you prefer.


Beat the egg in a small dish and sprinkle the egg with the cinnamon sugar.

Dip the french toast on both sides to coat.

In a nonstick skillet melt a little butter (1 teaspoon) over medium heat. Cook the french toast until it is golden on both sides. Top with the powdered sugar.

Enjoy!!!


Friday, April 15, 2011

Whole Grain Rice Pudding

I *love* when UPS shows up at my door when I'm not expecting any packages. How exciting!! I was selected as part of the Foodbuzz Tastemakers program to receive a free box of Uncle Ben's Whole Grain White Rice.

My challenge? To create a kid friendly recipe using whole grain rice. Of course I had to think outside the box. Kids can sniff out healthy ingredients from a million miles away. Nothing in the "rules" said that it couldn't be dessert!! ;)

There is NO WAY kids can spot this healthy substitution of whole grain rice! Even the healthiest of homes make the occasional (or more than occasional) dessert! Here is one simple way to feel better about giving your kids dessert.


Whole Grain Rice Pudding

  • 3/4 cup uncooked Uncle Ben's Whole Grain White Rice
  • 2 cups milk, divided
  • 1/4 cup sugar
  • 1/4 teaspoon salt
  • 1 tablespoon butter
  • 1 tablespoon pure maple syrup
  • 1/4 teaspoon cinnamon
  • 1/4 teaspoon pure vanilla extract
  • a pinch of nutmeg
  • 2/3 cup raisins
  • 1 egg, beaten
Bring 1 1/2 cups of water to a boil. Add the rice, reduce to a simmer, cover and cook 15 minutes. After the 10 minute mark start occasionally checking on the rice. You don't want it to overcook and start sticking to the pan!


Once the rice is cooked, add the 1 1/2 cups of the milk, sugar and salt. Stir to combine and simmer uncovered for 15-20 minutes, stirring occasionally, until most of the liquid is absorbed and the rice is creamy. Keep an eye on it and make sure your heat isn't up too high so you avoid burning the rice.


Add the remaining 1/2 cup of milk, beaten egg, butter, maple syrup, vanilla, nutmeg, cinnamon and raisins. Stir and cook an additional 3-5 minutes or until it thickens slightly. You can serve this warm or cold. I personally prefer it warm, but it is delicious either way.


If you want to give this recipe a shot, here is a link to a coupon for the Uncle Ben's rice. Enjoy!