Tuesday, April 12, 2011

Name that dessert

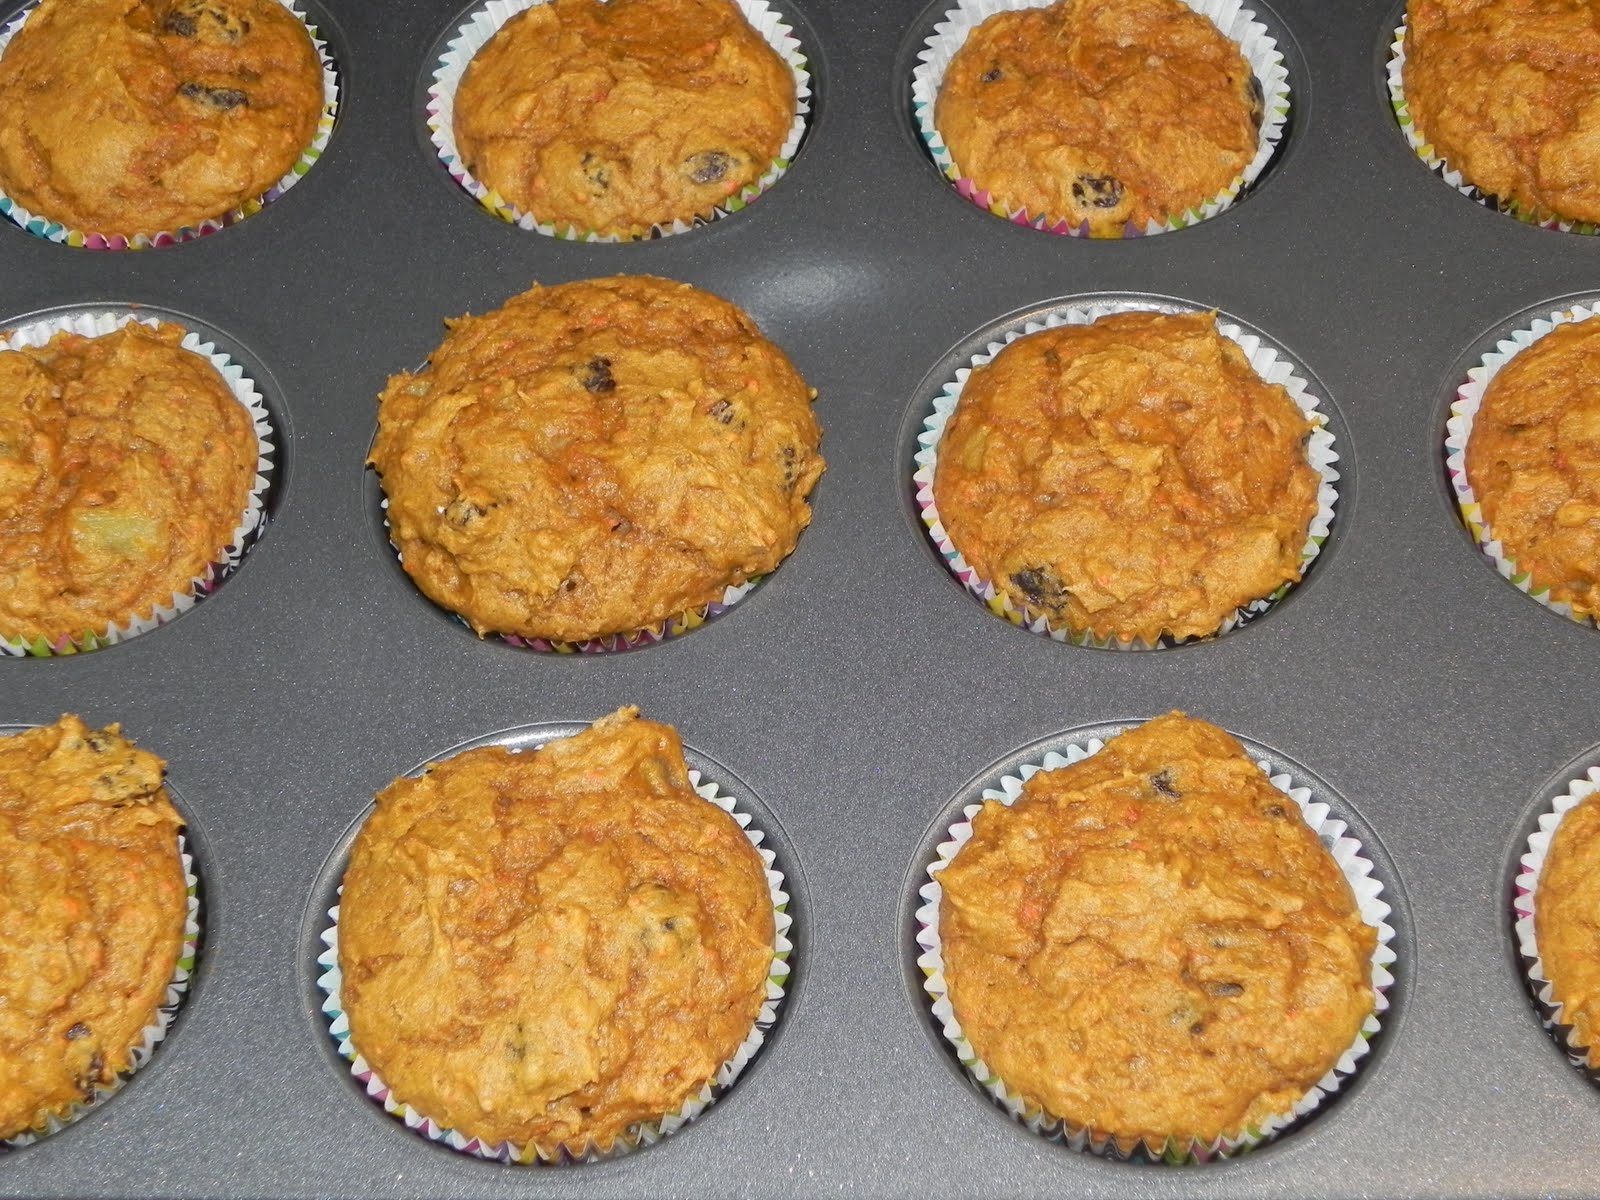
Every now and then I just start experimenting with things just to see what will happen. Tonight was one of those nights. I opened the pantry and found a cake mix in there that I didn't even know was in there! After a quick check of the expiration date I decided that I needed to do something with it. I'm pretty disgusted by pouring oil into any kind of baking. That's just gross. I searched around for some alternatives and came up with tonight's nameless treat.


What in the world is this?!?


  • 1 box carrot cake mix (do not follow the directions on the box)
  • 1 15oz can pumpkin
  • 1/2 cup crushed pineapple + 2 tablespoons of the juice
  • 1/2 cup raisins
Preheat oven to 350 degrees.

Mix all ingredients in a large bowl with a rubber spatula. Yep, it's that easy! I made this experiment into cupcakes/muffins. Line cupcake pans with paper cups and fill about 2/3 of the way. This made 17 cupcake/muffins for me. Bake for 18-20 minutes or until a toothpick inserted comes out clean.


Here is my problem. I have no idea what these actually are. Technically they were made using a "cake mix" so I guess I should call them cupcakes...but they just aren't a cupcake. They tasted more like a muffin. They came out so moist and definitely did NOT need frosting of any kind.


Today's public service announcement: Don't be afraid to experiment. You are in charge in your kitchen. Make things...try things. Worst case scenario is you have to throw it out, but the more you try the closer you will come to making great things!!

Sunday, April 10, 2011

Homemade Soft Pretzels

I always have mixed emotions when I bake things like this at home. I start out feeling a huge sense of accomplishment that I am able to make things like this in my own kitchen and then I feel angry that I never had enough faith in my cooking abilities to realize a long time ago that I could do it. Had I challenged myself a long time ago to do these things, I would have been making some seriously good things years ago! :)


A friend of mine had forwarded me a recipe for whole wheat soft pretzels and asked if I had any interest in blogging it. I was very interested in making pretzels so I decided to give it a shot. Unfortunately, that recipe was a flop. I'm not sure if it was the whole wheat that made my dough really tough and essentially a giant blobby mess or what, but there was no way I was making pretzels out of it. At that point I had my heart set on pretzels and there was no turning back. I grabbed my trusty bread baking bible otherwise known as:


I cannot say enough times how much I love this book. There has not be a single recipe in this book that hasn't turned out perfectly and it has really got me feeling confident in my bread baking abilities. Who kneads ( <--- LOL) a bread machine when you've got this book?? Not me!

Anyhow...back to my pretzels.

I whipped up the dough for these pretzels in just a few minutes and then the dough just had to sit around doing its own thing for a few hours while I got other things done. After a quick dunk in some boiling water and then 15 minutes in the oven *POOF* you've got some out of this world soft pretzels. I can honestly say that the hardest (and most amusing) thing about making these pretzels was figuring out how to make the pretzel shape. I felt ridiculous in my first few attempts...I mean, how hard could it be?? After cracking up and having my 7 year old laugh at me, Bryan stepped in and showed me how to do it! LOL How does my husband know how to make a pretzel shape and I don't? I was a quick learner and the pretzel making continued after a few more chuckles.

Homemade Soft Pretzels

  • 1 1/2 cups lukewarm water
  • 2 1/4 teaspoons granulated yeast (2 packets)
  • 2 1/4 teaspoons kosher salt
  • 2 1/4 teaspoons sugar
  • 3 1/8 cups bread flour
Start by mixing the yeast, water, salt and sugar in a large bowl.


Add the bread flour and stir with a spoon until it looks dry and shaggy.


Wet your hands slightly and then gently mix the rest of the flour in by hand. You don't have to knead the dough, just make sure all the flour is worked in.


Cover the bowl with a kitchen towel and allow it to sit at room temperature for about 2 hours. You can either make your pretzels right away, or refrigerate the dough for later. The dough is actually easier to work with when it is cold and the recipe says you can keep this dough refrigerated for use up to 14 days!!

When you are ready to make your pretzels, dust the surface of the dough with a little flour and cut off a piece of dough about the size of a small peach. The book says a 3oz piece of dough...I used my kitchen scale and the pieces I used were about 4oz-5oz each. You can do it however you like to. My recipe made 8 pretzels. Take the peach sized piece of dough and work it into a small ball by folding it under and smoothing out the top with your hands.


Elongate the ball of dough and keep rolling it on a floured surface into a 12 inch long rope.


Here comes the funny (and hard part of shaping the pretzel). Place the rope of dough into a U shape. Twist the dough around each other twice and then fold it down and press to make a pretzel.


I can guarantee you that you'll need to do this a few times to get the hang of it. Worst case scenario you'll have delicious pretzels that look absolutely nothing like a pretzel. It won't matter, you'll still eat it.

After you finish each pretzel, place it on a baking sheet and cover it loosely with plastic wrap while you make the other pretzels. Once you have shaped all the pretzels you can move on to boiling them.


You will need:
  • 8 quarts boiling water
  • 1 teaspoon baking soda
  • 1 tablespoon cream of tartar
You will also need 1 egg + 1 tablespoon water to make the egg wash and sea salt for sprinkling.

Heat the oven to 450 degrees with a baking stone on the center rack and a broiler pan on a rack below it.

Bring the 8 quarts of water to a boil and then turn the heat down to a simmer and add the baking soda and cream of tartar. You will notice it starts REALLY bubbling up after you do, so make sure to adjust the heat before you add it.


Cook the pretzels either one at a time or two at a time, making sure that the pretzels do NOT touch each other while they are boiling or they will lose their shape. Boil for 2 minutes on the first side and then flip with a slotted spoon and cook on the other side for an additional 1 minute.


Remove the pretzel from the boiling water and gently blot both sides on a kitchen towel lightly dusted with flour. You don't want to leave it sitting on the towel or it will stick to it. Just blot off the excess water and then place it on a cutting board dusted with whole wheat flour. Once all of the pretzels have been boiled, make the egg wash by mixing one egg with 1 tablespoon of water. Brush the egg wash on the pretzels and then give them a generous sprinkle of sea salt.


Place the pretzels on the hot baking stone and then pour 1 cup of hot water in the broiler pan below it (this will create steam in your oven while the pretzels bake).


Make sure you close that oven door quickly to trap the steam. Bake for 15-17 minutes or until the pretzels are a deep golden brown. Make sure to keep a good eye on them when they hit the 15 minute mark and pull them as soon as they reach the desired color.


Let them sit for a few minutes so you don't burn your mouth, but make sure to thoroughly enjoy them while they are still warm! That is the best part! What a DELICIOUS snack!


Tuesday, April 5, 2011

Creamy Baked Chicken

Chicken is one of my favorite foods. You could eat it every day of the week and it could taste totally different each time. I have been putting off going to the grocery store for a few days now. The thought of dragging two kids with me to go shopping is essentially terrifying. I actually *love* going to the grocery store, but when I have to take the kids I end up rushing, forgetting things and getting frustrated. I had to get creative to make dinner tonight out of what I had left in the house. I had some split chicken breasts in the freezer that ended up coming in handy!


Creamy Baked Chicken

  • 4 split chicken breasts, skin removed
  • 2 cups buttermilk (or you can make your own with 2 tablespoons lemon juice + milk to come up to the 2 cup mark in a measuring cup. Let it sit for 5 minutes before using.)
  • 1 can cream of mushroom soup
  • 2 teaspoons old bay seasoning
  • 1/2 teaspoon garlic powder
  • 1/4 teaspoon onion salt
  • 1/4 teaspoon thyme
  • 1/4 teaspoon basil
  • 1/4 teaspoon oregano
  • flour
  • 3 tablespoons butter
Preheat oven to 425 degrees.

Place the butter in a 9x13 dish and melt it in the oven, watch it carefully so it doesn't burn.


Remove the skin from the chicken and set aside.


Mix all of the spices together in a small bowl and stir to combine.


You will use 1 cup of the buttermilk now and the other cup later. Place 1 cup of buttermilk in a shallow dish and dip each piece of chicken in the milk. After you remove them from the buttermilk, season each side of the chicken with the spice mixture.


Fill another dish with some flour (maybe 1 1/2 cups or so). After all of the chicken has been dipped in the buttermilk and spice mixture, dredge the chicken in some flour.


Remove the 9x13 pan with the melted butter from the oven and place the chicken in the pan breast side down. Cook uncovered for 25 minutes @ 425 degrees.


Once the chicken has cooked for 25 minutes, turn the chicken over and cook for an additional 10 minutes on the other side.


Now take the other cup of buttermilk and mix it with the cream of mushroom soup. When the chicken is done cooking on the second side, pour the gravy mixture over the chicken. Cover with aluminum foil and cook for 10 more minutes.


This chicken came out SOOOOO good! Full of flavor, moist and the "gravy" was delish! I served it up over some rice. It took a total of 45 minutes to cook, but was very little effort on my part. A fantastic family meal.

Monday, April 4, 2011

Pineapple Oatmeal Raisin Cookies

I wasn't even sure that this cookie existed until I started to look for one. I absolutely love oatmeal raisin cookies, but when I thought about adding pineapple to it I was *really* wanting to try it. I went to my good ol' friend, Google, and started my search to see if a pineapple oatmeal raisin cookie recipe was out there somewhere. Sure enough, I found one! I was very hesitant to make these because I am a generally against using Crisco in anything. I have a very strange problem... I love, love, love to bake but I don't eat a lot of sweets and I am pretty much a health nut. When I see the butter content in recipes or the use of Crisco it makes me cringe, but for these cookies I had to give it a whirl.

I will tell you that these cookies were absolutely amazing! Imagine the most soft and moist oatmeal raisin cookie you've ever eaten with a nice tropical twist of pineapple. So good!

I will say that this recipe will be getting "Farrah-fied" to be more healthy next time by swapping out some of that shortening for canned pumpkin or applesauce and maybe even some adjustments to the brown sugar. For what it's worth, it was the best 147 calories worth of cookie I've had in a really long time :)


Pineapple Oatmeal Raisin Cookies

  • 2 cups all purpose flour
  • 1 cup brown sugar
  • 1 cup quick oats
  • 1 cup raisins
  • 1 cup crushed pineapple (I drained out most of the juice so it wasn't too watery)
  • 1 1/2 teaspoons baking powder
  • 1 teaspoon salt
  • 1 teaspoon vanilla extract
  • 2/3 cup Crisco shortening
  • 1 egg, lightly beaten (beat in a bowl by itself before adding to the rest of the ingredients)
This is basically the easiest cookie ever. Toss all of the ingredients in a bowl together and stir to combine or use a stand/hand mixer.


Once everything is thoroughly incorporated, drop by heaping tablespoons onto a cookie sheet. The recipe should make 24 cookies if you use a heaping tablespoon. If you make smaller cookies you will get more...I just prefer a bigger cookie :)


Bake @ 350 degrees for about 9-12 minutes or until just barely golden brown on the bottom. They will still be soft when you take them out of the oven, but you will be able to see the bottoms getting that golden color. Let them sit on the cookie sheet for 2-3 minutes to set up after they come out of the oven and then transfer them to a wire rack to cool the rest of the way.


These are a super soft cookie that will hold up really well at room temperature. Store either in an air tight container or ziplock bag.

Source: Eat Cook Share