

Dulce De-Lish-Eh
Preheat oven to 350 degrees.
You will want to bake the cakes in (2) 9" round cake pans and stagger the pans while baking so there is one cake pan on each rack of the oven. Place the pans so they aren't directly above each other, this will allow better air circulation.
Prepare the cake pans by spraying them with cooking spray made for baking (has flour included). Once the pan has been completely sprayed, cut two pieces of parchment paper to the size of the cake pan. I find it easiest to trace the pan with a pencil and then cut it out. Place the parchment paper in the bottom of the pan and then spray the parchment with the cooking spray as well. This will ensure that your cake will not stick to the inside of the pan!


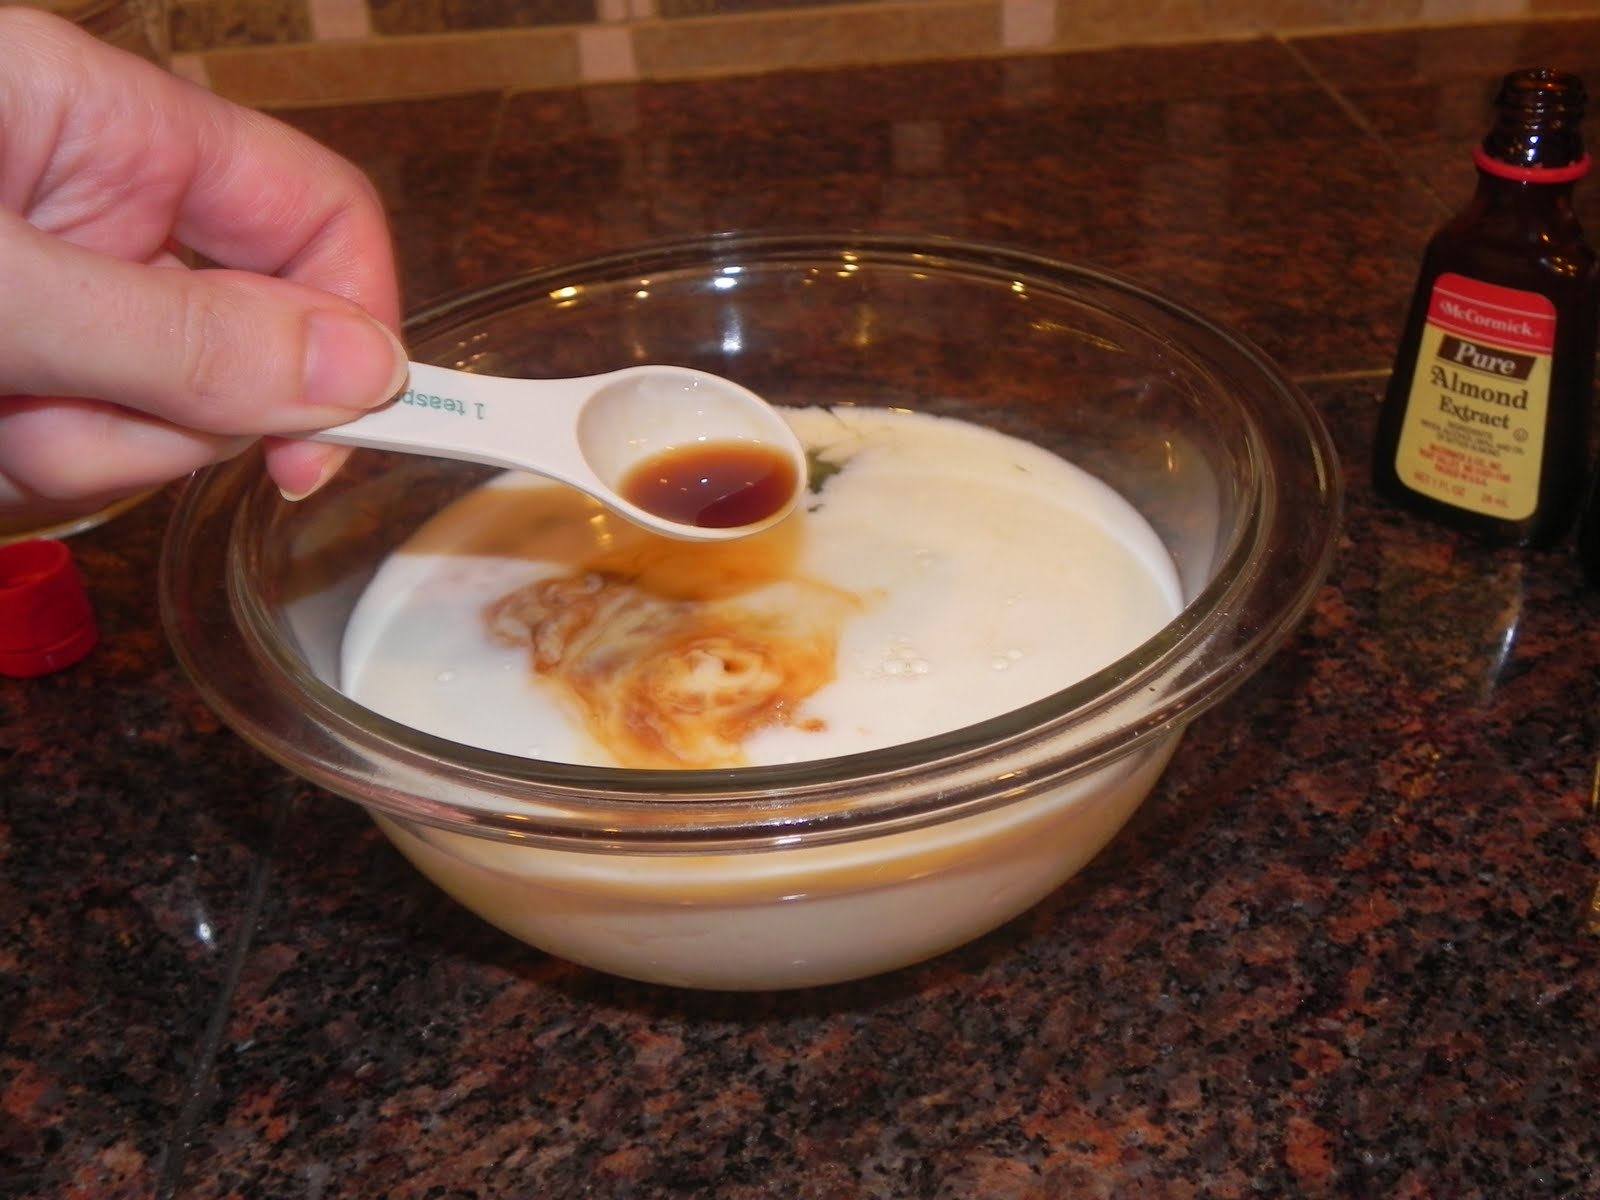
Separate your egg whites into a 2 cup glass measuring cup with the milk, almond extract and vanilla extract. Stir the mixture with a fork to combine. Allow it to come to room temperature. If you need to expedite the process you can set the measuring cup in a dish of hot water; this will speed up the process.


In the bowl of a stand mixer (or you can also use a hand mixer) add the cake flour, sugar, baking powder and salt. Mix on low speed to combine. Add the sugar and continue to mix on low speed until the mixture looks like moist cake crumbs.


Add all but 1/2 cup of your wet ingredients to the mixer and beat on medium speed for 1 1/2 minutes. Add the remaining 1/2 cup of wet ingredients and beat for an additional 30 seconds. Scrape the sides of the bowl and beat once more for 20 seconds.

Divide the batter evenly between the two cake pans and smooth with a spatula. Bake in the oven as directed above for 23-25 minutes, or until a toothpick inserted in the middle of the cake comes out clean. Mine was perfect at 24 minutes.


 Place a second rack on top of it and flip it back to the other side. Essentially, you want it to be right side up again! :) Allow the cake to cool completely before frosting, about 1 1/2 hours.


I'll bet you didn't know how easy it is to make your own dulce de leche at home. I am going to teach you a very neat trick. If you have sweetened condensed milk that you buy in the grocery store you can make it yourself! Use a shallow glass baking dish and empty the contents of the can into the pan. I used two cans for this cake because I wanted additional caramel for decorating and...well...just because we love caramel!

Once the condensed milk is in the pan cover it tightly with heavy duty aluminum foil. Place that pan inside of a larger baking pan and fill it with VERY hot water that comes about halfway up the sides of the first baking dish. Bake in the oven at 400 degrees for 1 1/2 hours.

You will want to keep an eye on the water level while it is in the oven. If at any time you notice that the water level has gone down, add additional hot water to the pan to bring it back to the halfway point. Once it is done, carefully remove the aliminum foil from the pan (please be careful of the steam) and allow it to cool slightly before whisking it together. Voila! You have dulce de leche!

Spread a layer of dulce de leche on your bottom layer of cake. Try not to spread it too far out to the edges or it will ooze over the sides and make spreading the frosting very difficult later. If you are careful it should be very easy to keep it from oozing out the sides. Place the top layer of cake on and get ready to frost the cake.


I decided that an espresso buttercream would be a great pairing for this cake. I made this frosting with some cupcakes back a few months ago and it was amazing.


In a small dish mix the vanilla extract and the instant espresso powder. Add to the frosting and mix again until it is combined. A very simple frosting that is incredible!


Just a side note - this made JUST enough frosting to cover this cake. If you like a lot of frosting on your cakes you will want to double this recipe. The caramel and frosting combo makes this a very sweet cake and I did not want a very thick layer of frosting on an already rich cake.
Spread the frosting on the cake starting on the top and spreading it out toward the edges. Work the excess down the sides. This is a homemade cake folks, it doesn't need to look professional. It will still taste amazing no matter how sloppy your frosting looks!


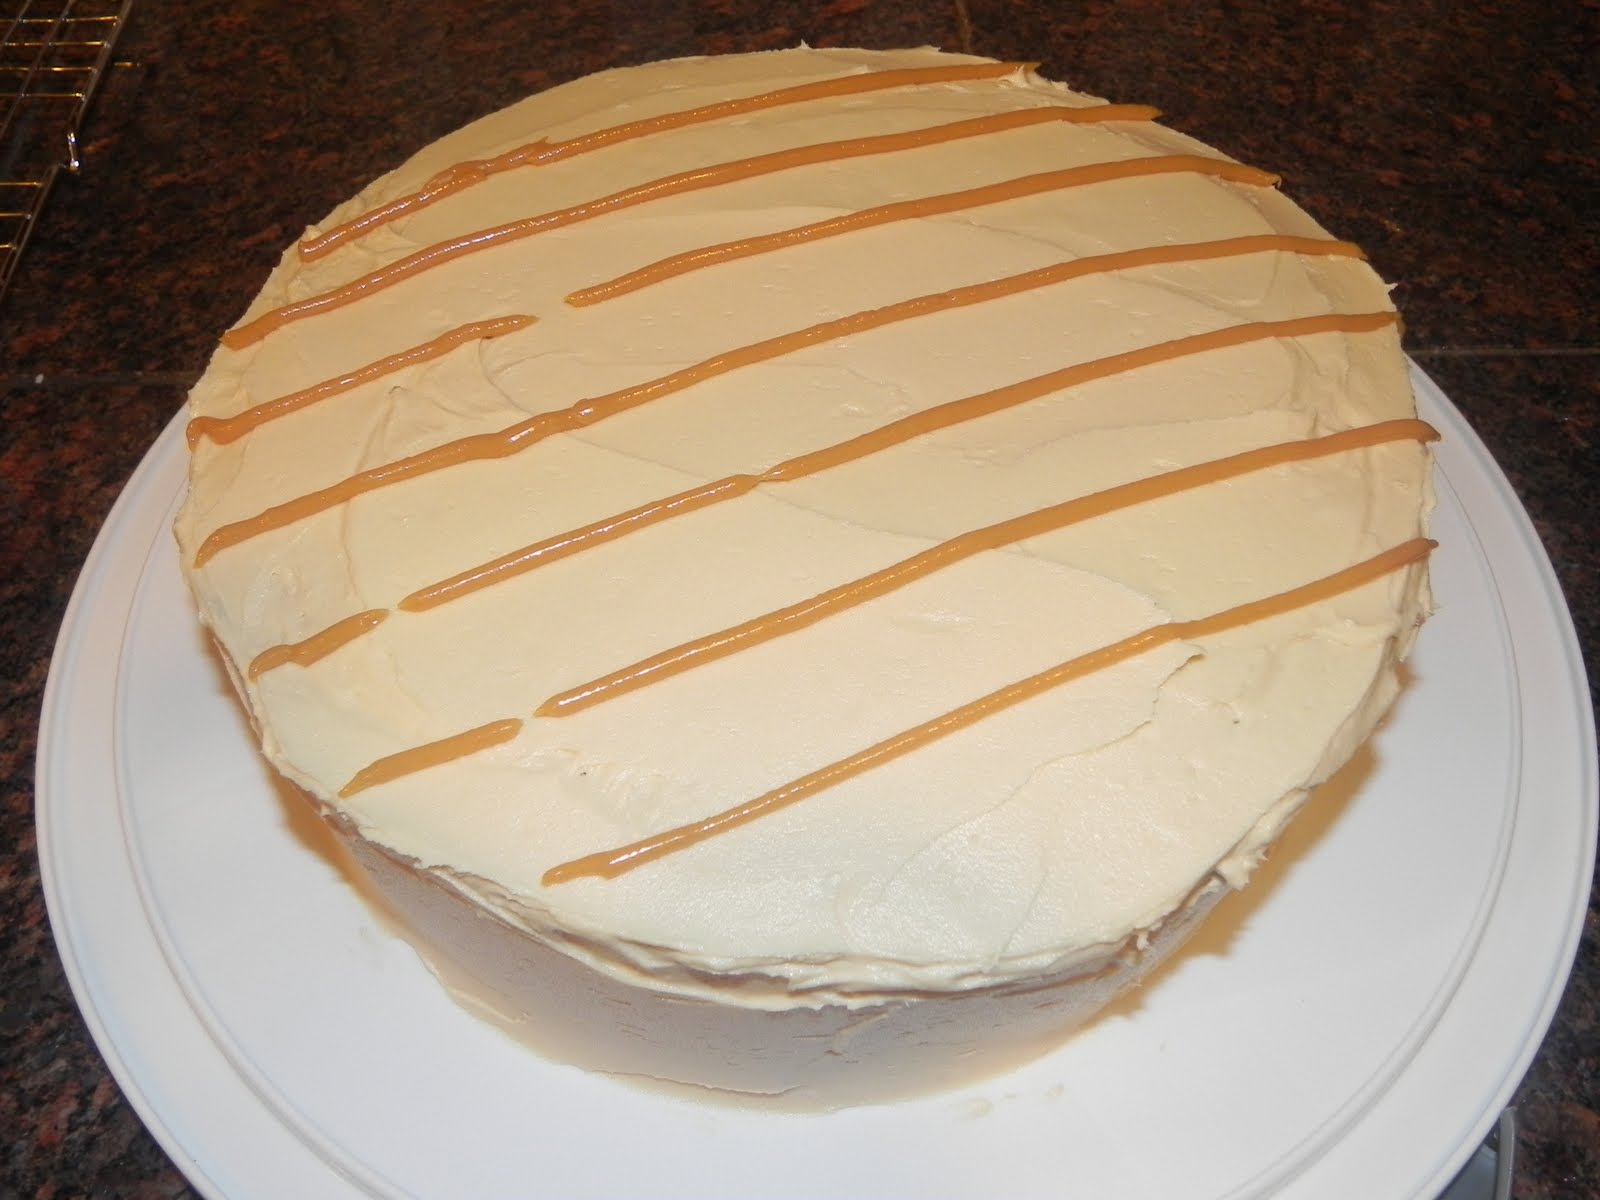
Once it is frosted you can decide how to finish it off. I decided to use some extra caramel to make a pattern on the top of the cake. I put the caramel in a disposable pastry bag and piped some lines across the top of the cake and then turned it the other direction to make a checkerboard pattern. Then I chopped up some chocolate and tossed some chocolate shavings on top.


This cake was soooooo good.


I had to work out extra hard tonight to try to burn off the calories in that cake, but I have to tell you that it was worth every.single.bite.

Source: Cook's Illustrated
- 2 1/4 cups cake flour
- 1 cup whole milk, at room temperature
- 6 large egg whites, at room temperature
- 2 teaspoons almond extract
- 1 teaspoon vanilla extract
- 1 3/4 cups sugar
- 4 teaspoons baking powder
- 1 teaspoon salt
- 12 tablespoons unsalted butter (1 1/2 sticks) softened but still cool
Preheat oven to 350 degrees.
You will want to bake the cakes in (2) 9" round cake pans and stagger the pans while baking so there is one cake pan on each rack of the oven. Place the pans so they aren't directly above each other, this will allow better air circulation.
Prepare the cake pans by spraying them with cooking spray made for baking (has flour included). Once the pan has been completely sprayed, cut two pieces of parchment paper to the size of the cake pan. I find it easiest to trace the pan with a pencil and then cut it out. Place the parchment paper in the bottom of the pan and then spray the parchment with the cooking spray as well. This will ensure that your cake will not stick to the inside of the pan!


Separate your egg whites into a 2 cup glass measuring cup with the milk, almond extract and vanilla extract. Stir the mixture with a fork to combine. Allow it to come to room temperature. If you need to expedite the process you can set the measuring cup in a dish of hot water; this will speed up the process.


In the bowl of a stand mixer (or you can also use a hand mixer) add the cake flour, sugar, baking powder and salt. Mix on low speed to combine. Add the sugar and continue to mix on low speed until the mixture looks like moist cake crumbs.


Add all but 1/2 cup of your wet ingredients to the mixer and beat on medium speed for 1 1/2 minutes. Add the remaining 1/2 cup of wet ingredients and beat for an additional 30 seconds. Scrape the sides of the bowl and beat once more for 20 seconds.

Divide the batter evenly between the two cake pans and smooth with a spatula. Bake in the oven as directed above for 23-25 minutes, or until a toothpick inserted in the middle of the cake comes out clean. Mine was perfect at 24 minutes.


When the cake is done, allow it to rest in the pan for 3 minutes and then flip it over on to a wire rack.
Remove the sheet of parchment paper.
Remove the sheet of parchment paper.

 Place a second rack on top of it and flip it back to the other side. Essentially, you want it to be right side up again! :) Allow the cake to cool completely before frosting, about 1 1/2 hours.

I'll bet you didn't know how easy it is to make your own dulce de leche at home. I am going to teach you a very neat trick. If you have sweetened condensed milk that you buy in the grocery store you can make it yourself! Use a shallow glass baking dish and empty the contents of the can into the pan. I used two cans for this cake because I wanted additional caramel for decorating and...well...just because we love caramel!

Once the condensed milk is in the pan cover it tightly with heavy duty aluminum foil. Place that pan inside of a larger baking pan and fill it with VERY hot water that comes about halfway up the sides of the first baking dish. Bake in the oven at 400 degrees for 1 1/2 hours.

You will want to keep an eye on the water level while it is in the oven. If at any time you notice that the water level has gone down, add additional hot water to the pan to bring it back to the halfway point. Once it is done, carefully remove the aliminum foil from the pan (please be careful of the steam) and allow it to cool slightly before whisking it together. Voila! You have dulce de leche!

Spread a layer of dulce de leche on your bottom layer of cake. Try not to spread it too far out to the edges or it will ooze over the sides and make spreading the frosting very difficult later. If you are careful it should be very easy to keep it from oozing out the sides. Place the top layer of cake on and get ready to frost the cake.


I decided that an espresso buttercream would be a great pairing for this cake. I made this frosting with some cupcakes back a few months ago and it was amazing.
- 2 sticks of unsalted butter at room temperature
- 2 1/2 cups powedered sugar
- 1 1/2 teaspoons vanilla extract
- 1 1/2 teaspoons instant espresso


In a small dish mix the vanilla extract and the instant espresso powder. Add to the frosting and mix again until it is combined. A very simple frosting that is incredible!


Just a side note - this made JUST enough frosting to cover this cake. If you like a lot of frosting on your cakes you will want to double this recipe. The caramel and frosting combo makes this a very sweet cake and I did not want a very thick layer of frosting on an already rich cake.
Spread the frosting on the cake starting on the top and spreading it out toward the edges. Work the excess down the sides. This is a homemade cake folks, it doesn't need to look professional. It will still taste amazing no matter how sloppy your frosting looks!


Once it is frosted you can decide how to finish it off. I decided to use some extra caramel to make a pattern on the top of the cake. I put the caramel in a disposable pastry bag and piped some lines across the top of the cake and then turned it the other direction to make a checkerboard pattern. Then I chopped up some chocolate and tossed some chocolate shavings on top.


This cake was soooooo good.

I had to work out extra hard tonight to try to burn off the calories in that cake, but I have to tell you that it was worth every.single.bite.
Happy Birthday, Bryan!

Source: Cook's Illustrated
5 comments:
Awesome cake, great name and it looks extremely delicious, your love is a lucky man! And happy B-day!
Cheers!
Beautiful cake! You will never hear me complain about seeing a number of wonderful, sweet recipes in a row. ;)
Oh that middle filling....it calls to me.
What a delicious cake! Love your step by step instructions, sometimes they make a difference. Happy BD to your husband and to many happy returns :)
This looks utterly lovely.
This looks worth every single calorie!
Post a Comment