Pages
Thursday, March 31, 2011
An apology
All that said, I will need to make some changes to my blog. I love my blog and will definitely continue to blog as much as I can. I am still trying to decide if I will go to a Monday, Wednesday, Friday posting schedule or if I will post daily and only include recipes when I have them.
Those of you who know me are well aware that I am never at a loss for words, so writing will never be a problem for me :)
Stay tuned for some changes coming up over the next few days!
Wednesday, March 16, 2011
Thin Mint Truffles
- 1 box Thin Mint cookies
- 4oz cream cheese (at room temperature)
- 1 14oz bag dark chocolate mint candy melts
- 1/2 cup dark green candy melts
Start by placing all of the thin mints in the food processor. Pulse the cookies until they resemble a fine crumb. In a large bowl combine the cream cheese and the cookie crumbs. You can try to use a plastic spatula to incorporate them, but I promise you that it won't work. Make sure you have nice clean hands and get right in there and work the crumbs into the cream cheese just like it is bread dough. Knead the mixture over and over again until everything is throughly combined.


Scoop into heaping teaspoons and then roll into small balls. I was able to get 26 truffles from one batch. Once you have formed all of the balls, place them in the refrigerator for about an hour to firm up.
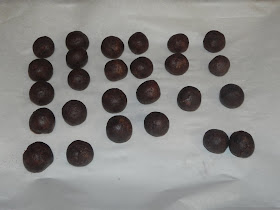
Heat water in the bottom of a double boiler. Melt the dark mint chocolate, stirring until it is smooth and no lumps remain.


I tip the pan slightly on its side while dipping the truffles in the chocolate. I found it easiest to use childrens chop sticks to hold onto the truffles. Shake off any excess chocolate and then place them on a cookie sheet lined with parchment paper. Allow them to sit until the chocolate is set, about 10 minutes.

Melt the green candy melts either over the double boiler or in the microwave. You can put the melted chocolate in a ziplock bag and snip the corner to drizzle the chocolate, but I find it easier to just dip a fork in the chocolate and drizzle it. Have fun and play! Remember when you were a kid and you would dip your paintbrush in paint and then flick it all over the paper? Well, that is what we are doing with the fork here. I actually like that they don't all look the same!

Enjoy!!!!
Wednesday, March 9, 2011
Feta Stuffed Chicken Breast with a White Bean and Olive Salad

- 4 skinless, boneless chicken breast halves
- 1/2 cup crumbled feta cheese (I used reduced fat feta)
- 1 teaspoon finely shredded lemon peel
- 1 tablespoon olive oil
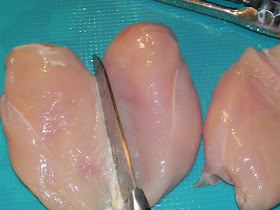

Mix the feta cheese and lemon peel in a small bowl. I used a microplane to zest my lemon and I had perfect little shreds of lemon peel. Once the feta and lemon peel is mixed, remove half of it (1/4 cup) and reserve it off to the side. You can add the extra to the chicken after it is cooked. If you want to you can just stuff all the feta now.


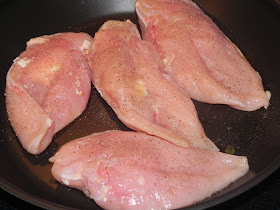
Heat the olive oil in a non stick skillet over medium heat and cook the chicken for 18 minutes, flipping once during the cooking time. I usually flip it over when the cooked portion (the part that starts looking white, has crept almost halfway up the side of the chicken).


White Bean and Olive Salad
- 3 cups baby spinach, roughly chopped
- 1 can (1 cup) white beans, drained and rinsed
- 1 cup halved cherry tomatoes
- 1/4 cup kalamata olives, pitted and quartered
- 1 teaspoon finely shredded lemon peel

Cut the cherry tomatoes in half

Drain and rinse your white beans. We don't want slimy beans in our salad!

I bought pitted olives so all I had to do is quarter them :)


Use your trusty microplane and add 1 teaspoon lemon peel to the top.


Stir everything together and voila!!
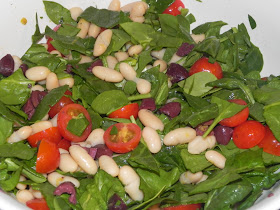
I thought this salad was fantastic!!! Since this recipe did not call for any type of dressing, I didn't use one, but I think next time I will either drizzle it with a little olive oil or use a vinaigrette dressing. What an interesting salad! I haven't ever made one quite like this; it was delicious!
Calorie count for the chicken is 236. If you use the reduced fat feta it is even less!
Calorie count for the salad is 118 per serving. The recipe says it makes 4 servings, but I think it serves more like 6 people.

Tuesday, March 1, 2011
Gimme "Samoa" That Popcorn
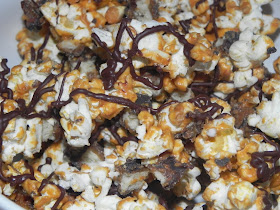
- 1 bag microwaveable popcorn (I used Smartpop 94% fat free...we'll add lots of fat later)
- 10 Samoa Girl Scout Cookies, cut into small pieces
- 1 cup butterscotch chips + 1 tablespoon crisco
- 1/4 cup chocolate chips + 1 teaspoon crisco


Melt the butterscotch chips with 1 tablespoon crisco in the microwave for 1 minute, remove and stir. Continue to melt in 30 second increments and stir until the mixture is smooth. You only want to do this until it is just melted, otherwise it could seize up and get lumpy.


Melt the chocolate chips with 1 teaspoon crisco in the microwave for 1 minute and then stir. Continue melting in 30 second increments until it is smooth. Spoon the chocolate into a ziplock bag and snip a tiny corner off the bag. Drizzle the chocolate over the top of the popcorn. Put the baking sheet in the fridge and let it set. When the chocolate hardens you can take it out of the fridge and break the popcorn up into pieces.


